A Window-Led Drawing Session on a Rainy Afternoon
A window-led drawing session turns shifting rain light into focused practice, helping you notice changing shapes without forcing a finished picture.
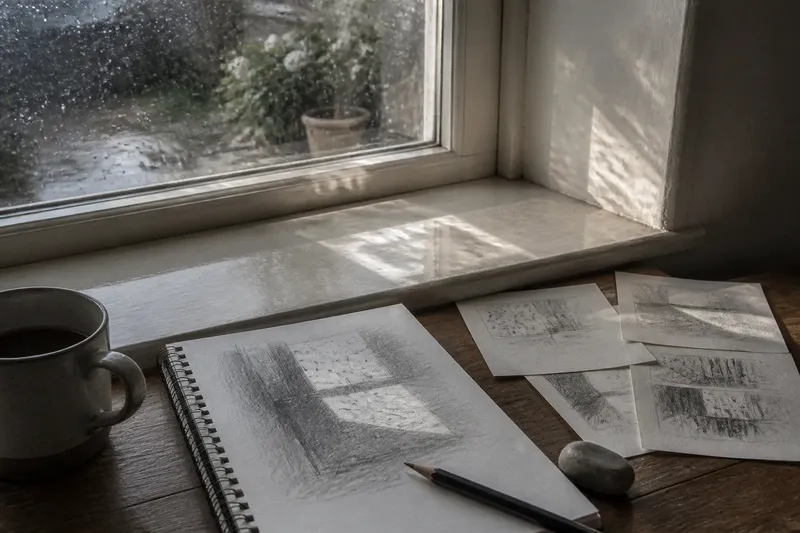
The common mistake in a window-led drawing session is to wait for the rain to produce a striking view, then chase it as if the page must become a finished picture. That expectation can make you overlook the quieter subject: the changing shapes of light on the glass, sill and nearby wall. A short session built around repeated observation gives you something more useful than a polished scene: a record of how looking changes as the weather moves.
Choose a place where you can sit comfortably and see a manageable patch of window. Keep the drawing materials simple: a pencil, a few sheets of paper and, if you like, a soft eraser. The central choice is how to follow the light. You can track its shape, compare its appearance over several visits to the page, or let the window organise a looser set of marks. Each approach suits a different kind of attention.
Choose what you want to notice, not what you want to finish
Window light rarely holds still. Rain can soften the view outside, bead on the pane or cast wavering reflections indoors. Rather than drawing every object, decide which change you want to notice. A bright patch moving across the sill, a reflection broken by droplets, or a pale rectangle on the floor can each become a subject in its own right.
Repeated observation means returning to the same view and checking what has altered. It is not a demand to make a new drawing each time. You might add a mark, adjust a boundary or simply look again before deciding what deserves attention. The page can remain incomplete; its purpose is to help you compare what you saw.
Before starting, settle on a viewing position and keep it for the session. A view from a chair beside the window is easier to revisit than one that requires you to move around the room. If the light changes so much that your chosen patch disappears, follow the change rather than treating it as a failure. The disappearance is part of what you are observing.
Three approaches keep the session responsive
Follow one shape as it changes
Choose a single patch of light or reflection and give it most of your attention. Sketch its outline lightly, then revisit it after looking out of the window or at the surrounding room. Notice whether the edge has softened, broken apart or shifted against a nearby object.
This approach suits a draughtsperson who wants to practise seeing boundaries without getting drawn into the whole view. It is especially useful when the rain makes distant details indistinct. Keep the drawing economical: a few marks can show where the shape begins, where it fades and how it relates to the sill or wall.
Make a sequence of small observations
Divide a sheet into a few open areas, or use separate scraps of paper, and return to the same view for each one. In each area, record only the light’s broad shape and one noticeable change. Leave space around the marks so that the comparisons remain easy to see.
This suits someone who likes to notice gradual shifts but finds a single drawing too absorbing. The sequence does not need equal intervals or identical compositions. Its value lies in placing separate moments beside one another, so a blurred reflection in one sketch can be compared with a clearer or more scattered one in another.
Draw the light through its effects
Instead of tracing the bright patch itself, attend to what it makes visible. Rain may blur the garden, reflections may tremble on the wall, and the window frame may divide the view into firm bands. Draw those relationships with short lines, soft shading or a deliberate gap in the paper.
This approach suits a person who prefers a lively page to a close study of one contour. It can also help when the light is too faint to define a neat shape. The aim is not to imitate every passing reflection, but to notice which marks make its presence legible.
Let the view decide between the approaches
The best choice depends on what the weather is offering and how you want to pay attention. A steady pool of light is easy to follow as one shape. A view that keeps changing in small increments may be easier to record in a sequence. If rain scatters reflections across several surfaces, drawing their effects can make more sense than trying to contain them in one outline.
Say you sit beside a kitchen window where a pale reflection crosses the sill and breaks into small glints on the glass. You begin by drawing the reflection’s edge, then look again and notice that the glints have become the more distinctive change. You can leave the first outline in place and add a small second observation beside it. The expected result is not a complete scene, but a page that lets you see which feature held your attention and how it shifted.
If you are unsure, start with the simplest approach for a short spell: follow one shape. If it stays stable, continue refining your observation. If it dissolves or wanders, switch to a sequence or draw its effects. Changing approach is a response to the view, not a failure to commit.
A small routine makes repeated looking easier
Keep the routine light enough that you can return to it without preparing a studio. Put the paper and pencil within reach, sit where you can see both the window and the surface receiving its light, and give yourself permission to pause between marks. Looking away briefly can make the next change easier to notice.
- Choose one visible area, such as the sill, a wall or a patch of floor.
- Notice whether the light has a clear edge, a soft edge or no stable boundary.
- Make a few light marks before deciding which details matter.
- Return to the view and compare one specific feature with your first observation.
- Change approach if the chosen shape vanishes or the reflections become more interesting.
- Stop when your attention begins to wander, rather than adding marks just to fill the page.
There is little value in trying to record every raindrop or repeatedly checking the clock. Those efforts can turn looking into a tally of details instead of an encounter with changing light. If you want to preserve a sequence, a brief note beside each drawing—such as “reflection broken” or “edge softened”—is often enough to clarify what you noticed.
Small decisions matter more than polished shading
For this kind of practice, pencil is useful because it allows tentative marks and quick adjustments. A soft eraser can lighten a boundary, but erasing is optional; a revised line beside the first can show that your perception changed. If you prefer ink, use it only if you are comfortable leaving marks visible rather than correcting them.
Work from broad relationships towards selected details. First notice where the light sits in relation to the frame or sill. Then decide whether a dark line, a pale gap or a shaded area best describes the change. Filling every area with tone may make the page look more resolved, but it can also obscure the distinctions you were trying to observe.
Keep the drawing’s scale comfortable for your hand and your view. A small study can hold a simple shape without encouraging you to copy the whole window. A larger sheet may give shifting marks room to breathe, but it is not inherently better. Choose the surface that lets you look back and forth easily.
Questions about drawing window light?
What should I draw if the light barely changes?
Look for a subtle difference in edge, clarity or contrast rather than waiting for the whole patch to move. You can also compare the reflection with the view beyond the glass, where rain may soften one while leaving the other more distinct.
Should I draw the view outside or the light indoors?
Choose whichever has the clearest change for your eye. The outdoor scene can provide blurred shapes and shifting contrast, while the room offers surfaces where light and reflection become easier to isolate.
What if I cannot draw a clean outline?
A clean outline is not required. Use separate short marks, a light shaded area or a blank gap to suggest where the shape is strongest and where it fades.
How do I know when the session is done?
Stop when you have made a useful comparison or no longer feel curious about the view. The page does not need a final pass to count as a complete session.
Choose a record that helps you look again
A window-led drawing session is most useful when its format matches the kind of change you notice. Follow one shape when its boundary holds your attention, make a sequence when comparison matters, or draw the effects when reflections scatter across the room. The main phrase, window-led drawing session, need not mean a drawing of the whole window; it can describe a focused return to one changing patch of light.
When you put the pencil down, leave the page somewhere you can glance at it later. That small act can make the next rainy afternoon easier to begin: you will already have a record of what you looked at, and a reason to see what the light does differently.